






Bisagras, manijas y pestillos industriales para equipos OEM.
- +86 13720060320


Selección de cierres de compresión para compartimentos de vehículos: apilamiento, precarga y vibración
Es posible que la puerta de un compartimento se cierre correctamente en el taller y, aun así, traquetee o presente fugas una vez que el vehículo entre en servicio.
El problema rara vez se debe únicamente al cuerpo del pestillo. La flexión del panel de la puerta, la compresión de la junta, la posición del retén, el juego de las bisagras, el movimiento de los elementos de fijación y las vibraciones de la carretera alteran la interacción entre el trinquete y el marco. Por lo tanto, una selección adecuada del cierre por compresión del habitáculo del vehículo debe comenzar por el ensamblaje de la puerta cerrada y seguir ese ensamblaje a lo largo de las fases de precarga, alineación, vibración y validación final de la puerta.
Esta página se aplica a las puertas de los almacenes para autocaravanas, las carrocerías de servicio de los camiones utilitarios, los paneles de acceso a la maquinaria de construcción, los compartimentos para el equipamiento de los vehículos de emergencia y las cajas eléctricas de los vehículos. No abarca las cerraduras principales de las puertas de los turismos, los requisitos de cierre automático en caso de colisión, las funciones de retención de los ocupantes ni los sistemas de seguridad del maletero.
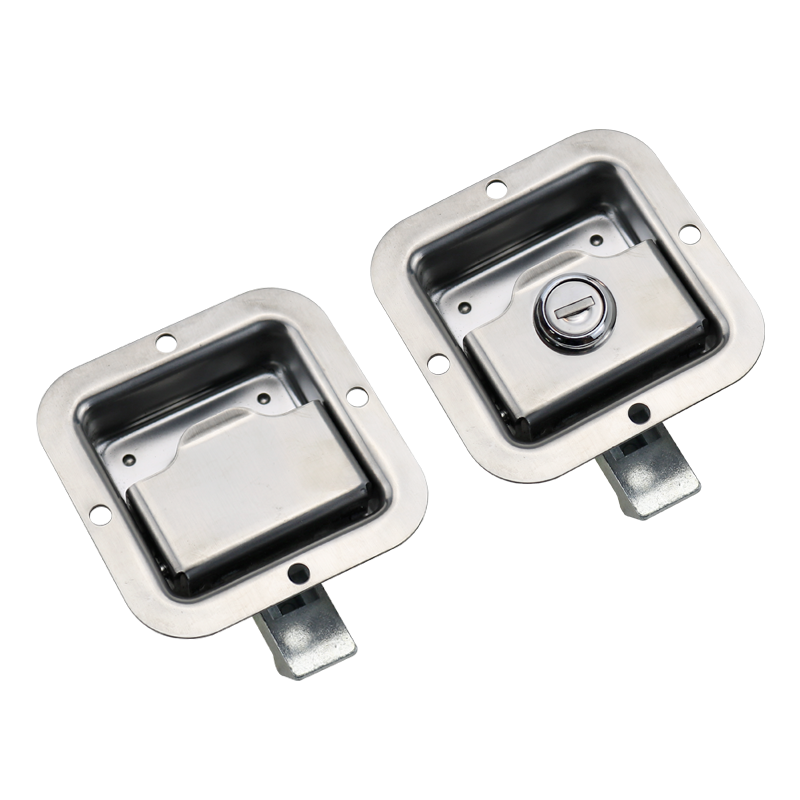
La navegación general por modelos pertenece a la Categoría de productos: cierres de compresión. En los casos en que el proyecto aún no haya determinado si es necesario un mecanismo de compresión, utilice el Comparación entre el cierre de leva y el cierre por compresión En primer lugar. La secuencia que figura a continuación parte de la base de que la puerta requiere un cierre controlado, una precarga de la junta o una retención resistente a las vibraciones.
Empieza con el «stack-up» a puerta cerrada
No empieces por el recorte del pestillo. Empieza por la posición que debe ocupar la puerta completa cuando esté cerrada y funcione correctamente.
Esa posición de cierre viene determinada por varias piezas a la vez: el revestimiento de la puerta, el refuerzo local, el eje de la bisagra, el marco, el soporte del pestillo, la junta, el espesor del recubrimiento y la superficie de montaje del pestillo. Cada pieza tiene su propia tolerancia. Los procesos de soldadura, moldeado, recubrimiento y montaje de la carrocería pueden alterar la relación final, incluso cuando los planos individuales sean correctos.
Establece un sistema de referencia único para la puerta montada. En un informe práctico se indica lo siguiente:
- El plano de montaje del pestillo en la puerta.
- La superficie de contacto del retén en el bastidor.
- El espacio libre que queda entre la junta y la puerta antes de que esta entre en contacto con ella.
- La posición de cierre prevista tras la compresión.
- La posición de la puerta, apoyada en las bisagras, en el lado del pestillo y en las esquinas.
- Cualquier refuerzo, dobladillo, forro, ribete o soporte que modifique el espesor en un punto concreto.
- Las capas de recubrimiento y sellador que influyen en el juego final del conjunto.
Mide el espesor total con la junta y las bisagras definitivas instaladas. El espesor nominal de la chapa no refleja las condiciones reales de sujeción. Tampoco lo hace una sección generada por CAD que omita la deformación por soldadura, el recubrimiento o la compresión de la junta.
Nota técnica: Si en el proyecto no se pueden definir el punto de referencia con la puerta cerrada y la posición de la junta, es demasiado pronto para aprobar un rango de sujeción o fijar la ubicación del retén.
Ajustar el margen de compresión de la junta
El pestillo necesita un margen de funcionamiento, no un punto de referencia único. El límite inferior es la posición en la que la junta está lo suficientemente comprimida como para cumplir su función de sellado y amortiguación de vibraciones. El límite superior es la posición más allá de la cual el esfuerzo de accionamiento, la deformación de la puerta, la carga sobre el cerrojo o la deformación permanente de la junta se vuelven inaceptables.
Utiliza los datos del proveedor de juntas cuando estén disponibles. Anota el perfil libre, el rango de compresión recomendado, el material, las condiciones de temperatura y la deformación permanente prevista. Sin esos valores, el equipo encargado del cierre puede describir la geometría, pero no puede demostrar que la precarga sea la correcta.
| Estado de Stack-Up | Qué representa | Lo que el pestillo aún debe hacer |
|---|---|---|
| Espesor mínimo en estado cerrado | Las tolerancias de la puerta y el marco dan lugar al hueco más pequeño | Lograr el acoplamiento sin una sobrecompresión excesiva ni un esfuerzo de funcionamiento elevado |
| Apilamiento nominal cerrado | Objetivo de diseño con la junta de producción instalada | Accionar cerca de la posición de ajuste deseada con una precarga estable |
| Altura máxima de apilamiento en posición cerrada | Las tolerancias de la puerta y el marco son las que provocan el hueco más grande | Mantener un recorrido de tracción suficiente y un acoplamiento adecuado del retén |
| Junta tras la deformación por compresión | La junta recupera menos sus propiedades tras un tiempo de uso. | Deja margen suficiente para restablecer la precarga sin deformar la puerta |
IEC 60529 clasifica la protección contra la entrada de elementos en las carcasas completas de los equipos eléctricos. No define la compresión correcta de la junta para la puerta de un vehículo concreto, ni certifica un pestillo sin instalar. La tarea de sellado de la carcasa se trata con mayor detalle en el Guía de sellado de la carcasa con cierre de compresión.
Una mayor compresión puede abrir otra vía
Aparecen manchas de humedad cerca de una esquina, por lo que se aprieta el retenedor. La junta del lado del pestillo se comprime con más fuerza, pero la puerta, al ser delgada, se comba entre el pestillo y la bisagra. La esquina opuesta se levanta ligeramente. Aumenta la fuerza necesaria para cerrarla y la junta situada junto al pestillo empieza a deformarse de forma permanente.
La respuesta correcta es comprobar el patrón de compresión completo, la rigidez de los paneles, el soporte de sujeción, la posición de las bisagras y la separación entre los puntos de bloqueo. Un mayor ajuste no implica automáticamente un mejor sellado.
Se trata de un ejemplo ilustrativo de ingeniería, no de un informe de proyecto de un cliente ni de una afirmación sobre las pruebas de un producto.
Adapta la gama de agarres al apilamiento
Ahora compara el margen de compresión de la puerta con el modelo de pestillo seleccionado. El pestillo debe engancharse en el cerrojo antes de que comience la compresión y, a continuación, proporcionar un recorrido de cierre controlado suficiente para que la puerta se sitúe dentro del margen aceptado.
Los datos relevantes del modelo suelen incluir el rango de sujeción, la geometría del trinquete o la leva, la carrera de compresión, el ajuste del retén, la profundidad trasera y el método de ajuste. Un simple plano de la brida no basta para responder a esas preguntas.
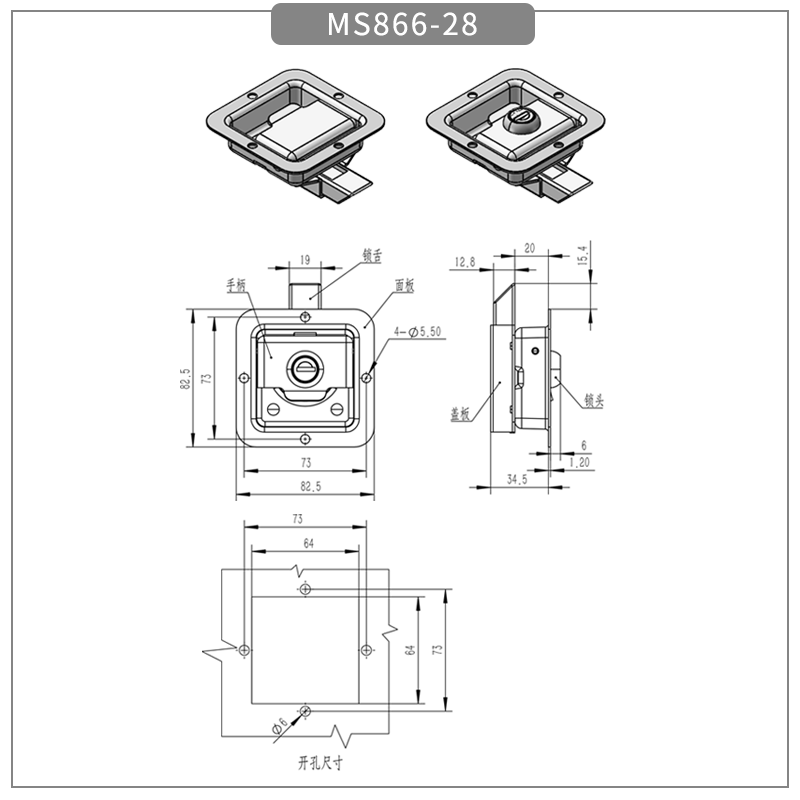
Utiliza el dibujo en dos pasadas:
- Ajuste de la interfaz: Comprueba el tamaño de la brida, la disposición de montaje, el recorte, el espacio libre trasero, el acceso a los elementos de fijación y el soporte del panel circundante.
- En forma para trabajar: Confirme que la trayectoria del trinquete y su ajuste cubran los estados de apilamiento mínimo, nominal y máximo, manteniendo al mismo tiempo un acoplamiento suficiente.
Si el documento disponible solo muestra el exterior y la geometría de los orificios de montaje, ponte en contacto con el proveedor para obtener las dimensiones funcionales que faltan. No deduzcas el rango de sujeción a partir de la profundidad de la brida ni de los centros de montaje.
Utiliza datos específicos del modelo: Los valores de rango de sujeción, carrera de compresión, par de funcionamiento, carga, vida útil y límites de temperatura solo deben utilizarse cuando estén vinculados al modelo seleccionado, la dirección de ensayo, el dispositivo de sujeción, el panel, los elementos de fijación, la posición de ajuste, los criterios de aceptación y la revisión del documento.
Localiza el cierre antes de congelar la pieza recortada
El retén determina el punto en el que el trinquete comienza a engancharse y el punto en el que se inicia la compresión. Esa relación debe determinarse antes de dar por definitivos el recorte de la puerta y los orificios de montaje.
Cierra la puerta de producción contra la junta y observa el recorrido del trinquete. El retén debe permitir el acoplamiento inicial sin que se produzca contacto con los bordes, atascos ni cargas laterales. A medida que la manilla gira o se cierra, el mecanismo debe empujar la puerta hacia el espacio de compresión, en lugar de arrastrar el trinquete a lo largo de un retén desalineado.
- Sujeta el soporte para que no se doble bajo la carga de tracción.
- Realice los ajustes necesarios cuando así lo requieran las tolerancias de la carrocería, el bastidor, las juntas o las soldaduras.
- Comprueba la posición final tras la soldadura, el enfriamiento, el recubrimiento y el montaje en la carrocería del vehículo.
- Deja suficiente espacio libre en la parte trasera para el recorrido del trinquete, la articulación, los elementos de fijación, el cilindro y las herramientas de mantenimiento.
- Asegúrate de que la brida del cierre descanse sobre una superficie plana y no se apoye en ningún pliegue, reborde, soldadura o elemento moldeado.
- Revisa los dispositivos antirrotación de los cuerpos roscados, los insertos, los reténes ranurados y los elementos de fijación.
El plano puede ser adecuado. Aun así, el trinquete podría fallar. Por eso es necesario revisar el eje del pestillo, la trayectoria del trinquete, la superficie del retén, la posición de la junta comprimida y el soporte local del panel como un único conjunto.
Deformación de la puerta entre los puntos de bloqueo
Una puerta pequeña y rígida puede funcionar con un solo pestillo. Una puerta de compartimento alta o ancha puede permanecer enganchada en el pestillo y, aun así, levantarse entre los puntos de cierre. La esquina por la que entra aire puede estar lejos del pestillo, que parece estar correctamente ajustado.
Antes de añadir un segundo pestillo, determina qué es lo que realmente se mueve:
| Comportamiento observado de la puerta | Posible causa estructural | Respuesta técnica |
|---|---|---|
| El borde central se levanta entre dos esquinas | Rigidez insuficiente del borde de la puerta o distancia excesiva entre los puntos de cierre | Revisar el refuerzo, la rigidez del bastidor y la separación entre los pestillos |
| Las juntas del lado del pestillo están bien ajustadas, pero las del lado de las bisagras siguen estando flojas | El eje de la bisagra, el recorrido de la junta o la torsión de la puerta modifican la geometría en posición cerrada. | Corregir el apilamiento en el lado de la bisagra antes de aumentar la precarga del pestillo |
| Dos pestillos se cierran con una fuerza diferente | Posición incorrecta del portador, torsión de la puerta o holgura en el sistema de articulación | Ajusta ambos topes a partir del mismo punto de referencia de puerta cerrada |
| La manilla central se cierra, pero la esquina del mando a distancia sigue suelta | Flexión de la varilla, juego o ajuste incorrecto del retenedor remoto | Inspecciona el soporte de la articulación y mide directamente la compresión a distancia |
El hecho de añadir más pestillos no mejora automáticamente el funcionamiento de la puerta. Los sistemas de cierre multipunto requieren un método de ajuste controlado. De lo contrario, un pestillo soportará la mayor parte de la fuerza de tracción, mientras que otro solo parecerá estar cerrado.
¿Qué cambia tras las vibraciones de la carretera?
La vibración de la carretera debe analizarse mediante una comparación entre el estado inicial y el final. La prueba solo resulta útil si primero se registra el estado inicial.
Antes de la prueba en carretera o en banco de pruebas, anota la posición del cierre, el ajuste del pestillo, el esfuerzo necesario para abrir y cerrar, los huecos en las esquinas de las puertas, el patrón de contacto de las juntas, las marcas de referencia de los elementos de fijación y cualquier holgura. Repite las mismas observaciones después. El cambio es la prueba.
| Elemento «antes/después» | Cambios a tener en cuenta | Lo que sugiere el cambio |
|---|---|---|
| Posición de portero | Desplazamiento, deformación de los soportes o movimiento de las marcas de referencia | La sujeción del retén o la retención del elemento de fijación es insuficiente |
| Esfuerzo operativo | Fuerza de cierre mayor, menor o irregular | Ha cambiado la alineación, la contaminación, la precarga de la junta o el desgaste interno. |
| Holgura en la esquina de la puerta | Nueva elevación en una esquina o entre puntos de bloqueo | La deformación de la puerta, el marco, la bisagra o el mecanismo de articulación ha alterado la geometría en posición cerrada. |
| Huella de la junta | Contacto más ligero, irregular o aplastado en algunas zonas | Se ha perdido o redistribuido la precarga |
| Marcas de los elementos de fijación | Rotación, deslizamiento, movimiento de la arandela o orificios alargados | La interfaz de montaje se desplaza bajo una carga dinámica |
| Sonajero y juego libre | Nuevo micromovimiento sin desbloqueo completo | El trinquete sigue sujetando la puerta, pero la precarga operativa o el control interno han disminuido. |
IEC 60068-2-6 establece un método normalizado de ensayo de vibración sinusoidal. No define el nivel de severidad adecuado para el vehículo, el dispositivo de sujeción, la masa de la puerta, la duración, el rango de frecuencias ni el límite de aceptación. Dichos valores deben derivarse del programa del vehículo correspondiente o de las especificaciones del proyecto.
Acceso operativo y materiales de los componentes
Una vez que la interfaz mecánica esté estable, comprueba cómo se accionará el cierre y de qué material están hechos todos los componentes expuestos.
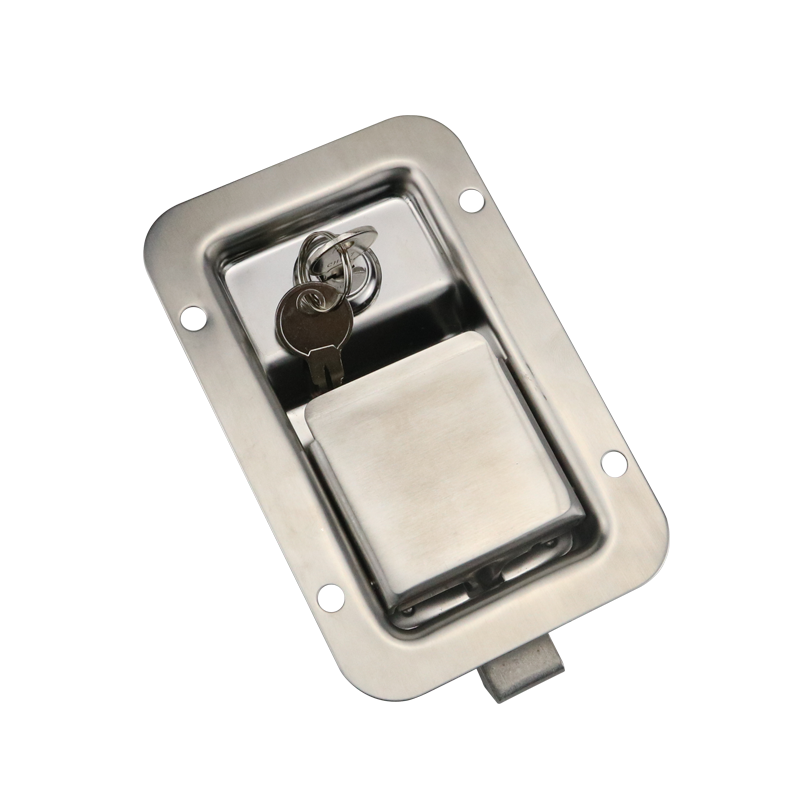
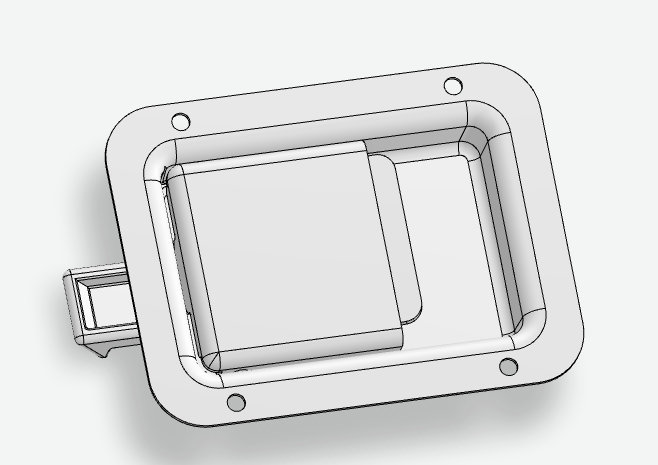
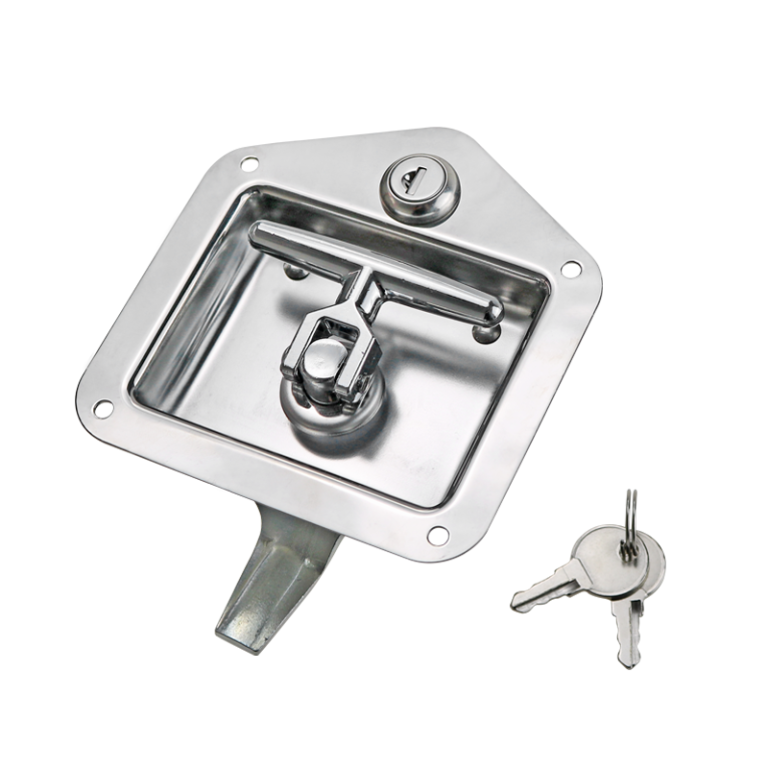
Una manilla empotrada con llave puede ser adecuada para puertas de autocaravanas o de carrocerías de servicio en las que se requiera un exterior a ras y un acceso controlado. Los insertos accionados con herramientas pueden ser adecuados para compartimentos eléctricos. El accionamiento mediante palanca o pomo puede resultar adecuado para un mantenimiento frecuente, pero puede plantear problemas de saliente o de holgura por vibraciones. Los sistemas de articulación multipunto aportan alineación de varillas, soporte, reducción del movimiento perdido y ajuste sincronizado a la solución.
Utilice la llave, la herramienta o el mango originales, sin olvidar ponerse los guantes adecuados. Compruebe el espacio libre para las manos, la fuerza de accionamiento, las salientes, el drenaje y si el usuario puede detectar cuándo está completamente cerrado.
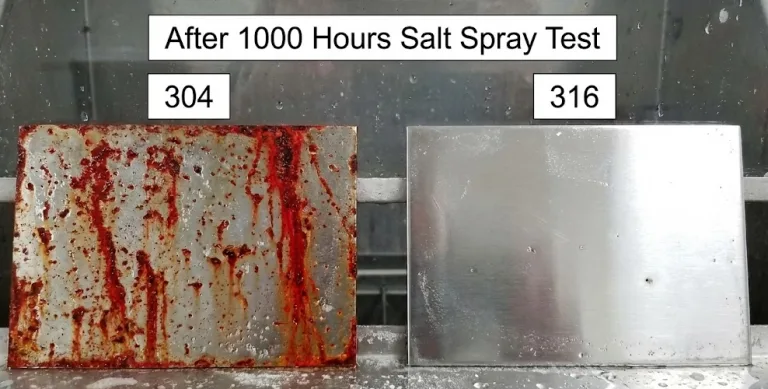
A continuación, revisa todo el sistema de materiales. Una carcasa de acero inoxidable puede contener aún un trinquete chapado, un muelle de acero al carbono, un cilindro de aleación de zinc, una junta de polímero, piezas clave de latón y elementos de fijación recubiertos. La sal de carretera, los productos químicos de lavado, el barro, el agua retenida, la exposición a ciclos de congelación-descongelación, el calor y el contacto entre metales diferentes pueden hacer que una pieza oculta sea la que marque el límite de la vida útil.
Revisión de materiales: Solicita la información relativa a la carcasa, el trinquete, el pasador, el muelle, el cilindro, el retén, el elemento de fijación, la junta y el acabado. La expresión “cerrojo de acero inoxidable” no constituye una especificación ambiental completa.
Aprobar la puerta del compartimento completo
Una prueba con el pestillo suelto confirma el aspecto y el movimiento básico. No confirma el ajuste de la puerta cerrada, la precarga de la junta, la alineación del retén, la deformación de la puerta, el comportamiento ante las vibraciones ni el rendimiento frente a la entrada de elementos externos.
Instala el modelo seleccionado en una puerta destinada a la producción con el panel, el refuerzo, las bisagras, la junta, el cerrojo, el recubrimiento, los elementos de fijación, el sistema de articulación y el bastidor del lado del vehículo reales. Utiliza un único registro de liberación para el conjunto completo:
| Pruebas de la puesta en libertad | Qué grabar | Motivo por el que lo grabé |
|---|---|---|
| Maqueta y plano | Modelo de pestillo, contrapestillo, revisión del plano, recorte, patrón de montaje, posición de ajuste | Evita que las dimensiones o el rendimiento de un modelo se transfieran a otro |
| Referencia a puerta cerrada | Cota de la puerta, holguras en las esquinas, huella de la junta, esfuerzo de accionamiento, enganche del trinquete, marcas de referencia de los elementos de fijación | Sirve de referencia para futuras comprobaciones medioambientales y de vibraciones |
| Estructura de la puerta | Panel, refuerzo, marco, sistema de bisagras, soporte del pestillo, número de pestillos y distancia entre ellos | Vincula el comportamiento del cierre a la trayectoria real de la carga |
| Medio ambiente | Acondicionamiento térmico, pruebas de resistencia al agua o al polvo, productos químicos de lavado, contaminación, exposición a la sal de carretera | Muestra qué condiciones del servicio se han revisado realmente |
| Resultado dinámico | Perfil de ensayo, dispositivo de sujeción, duración, alineación tras el ensayo, holgura, precarga, estado de los elementos de fijación | Muestra qué ha cambiado tras la carga dinámica |
| Aceptación | Criterios de aprobación/suspenso, resultado obtenido, número o fecha del informe, revisor responsable | Distingue entre las pruebas observadas y una afirmación sobre el producto que carece de fundamento |
La puerta solo estará lista para su puesta en servicio cuando se mantenga alineada, operativa, fijada y debidamente sellada en las condiciones especificadas. Si el resultado de la prueba cambia tras el ajuste, anote la nueva posición del pestillo y repita las comprobaciones correspondientes. No apruebe el pestillo independientemente del compartimento que controla.
Envía el «Stack-Up» a puerta cerrada
Indique el tipo de compartimento, la sección de la puerta y el marco, el perfil de la junta, la posición de compresión prevista, la ubicación del retén, los límites de recorte, el número de pestillos, el método de accionamiento, el entorno en el que se utilizará el material y los requisitos aplicables en materia de vibraciones o entrada de elementos extraños. HTAN puede utilizar esos datos para identificar los modelos de pestillos de compresión pertinentes y la información de los planos específicos de cada modelo que aún requiere validación mediante muestras.
PREGUNTAS FRECUENTES
¿Puedo determinar el rango de sujeción del cierre de compresión basándome únicamente en el grosor del panel?
No. El rango de sujeción depende del conjunto completo de la puerta cerrada: panel y refuerzo, desplazamiento del retén, altura libre de la junta, posición de compresión prevista, recubrimiento, tolerancia de fabricación y ajuste disponible del pestillo.
¿Un cierre a presión confiere a un compartimento del vehículo una clasificación IP?
No. El pestillo puede ayudar a aplicar la precarga a la junta, pero es el compartimento en su conjunto el que determina el rendimiento frente a la entrada de aire. La rigidez de la puerta, la planitud del marco, la posición de las bisagras, el perfil de la junta, la distancia entre pestillos, los recortes, los elementos de fijación y la prueba final del cerramiento son factores que influyen.
¿Por qué puede traquetear la puerta aunque el pestillo siga cerrado?
Es posible que el trinquete siga sujetando la puerta aunque la precarga de funcionamiento haya disminuido. La deformación permanente de la junta, el movimiento del retén, el desgaste de las bisagras, la flexión del panel, el deslizamiento de los elementos de fijación, el juego en el mecanismo de articulación o el holgura interna del pestillo pueden permitir micromovimientos sin que se desenganche por completo.
¿Debe fijarse la posición del retén antes de soltar el corte del pestillo?
Sí, primero hay que resolver la cuestión del retén. Confirma los datos de la puerta cerrada, la trayectoria del trinquete, el primer punto de acoplamiento, el punto de inicio de la compresión y el soporte del retén antes de dar por definitivos el recorte y los orificios de montaje.
¿Cuántos cierres de compresión necesita la puerta de un compartimento grande de un vehículo?
No existe una cifra universal. La rigidez de la puerta y el marco, la longitud del borde sin apoyo, el recorrido de la junta, la distancia entre las bisagras, la carga externa, la deflexión admisible y el hecho de que los pestillos funcionen de forma independiente o mediante un sistema de articulación determinan la cantidad y la separación.