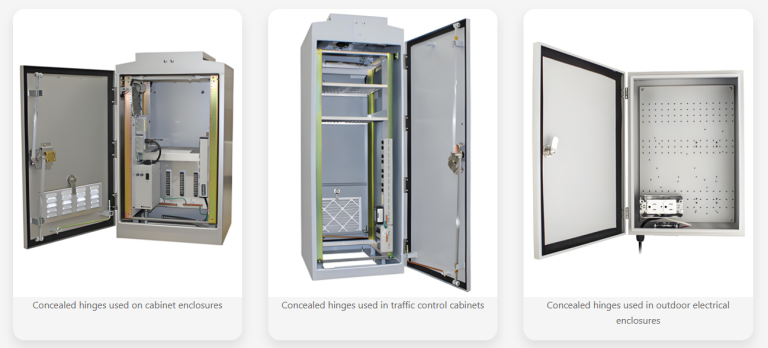
HTAN is one of the leading manufacturers of industrial hinges, handles and latches in China.


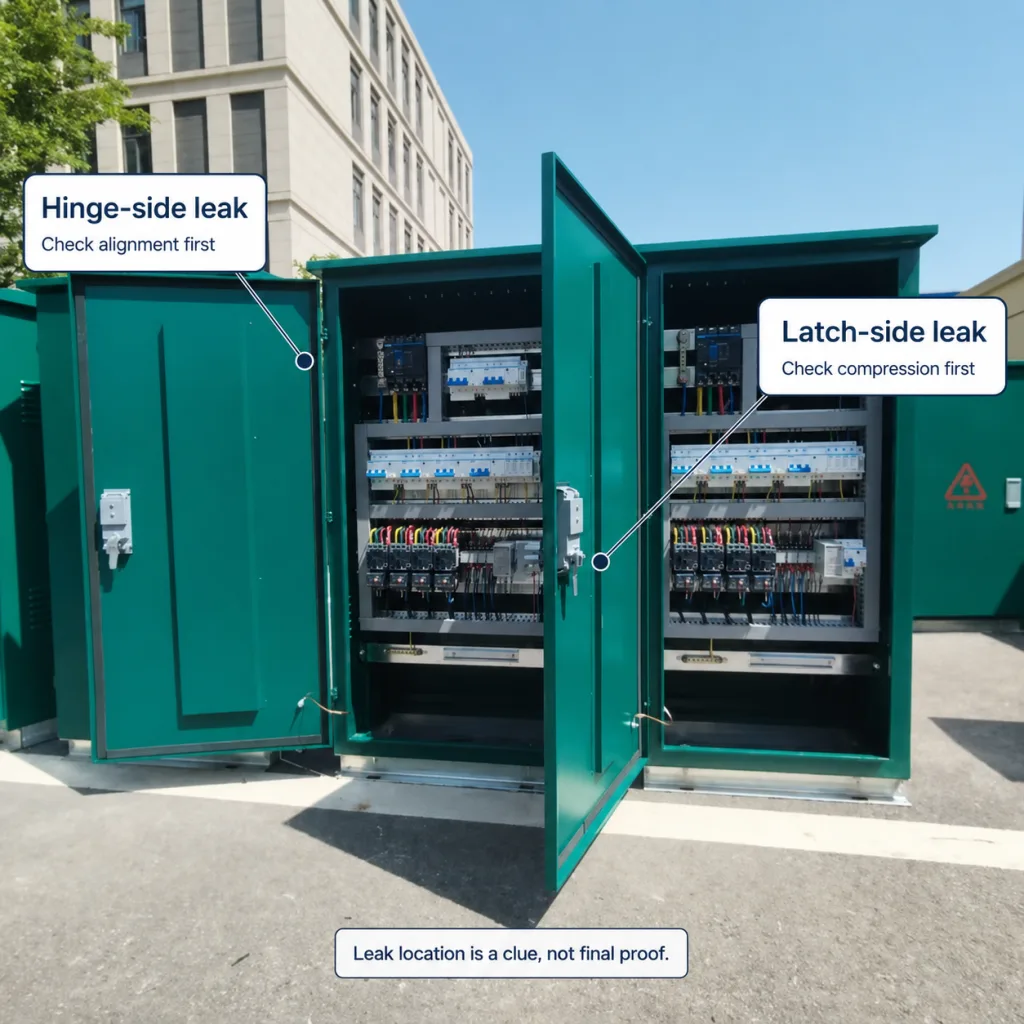
An outdoor enclosure leak is easy to misread. Water may appear near the hinge side, drip from the latch side, collect at the bottom corner, or run along the frame before it becomes visible. But the place where water shows up is not always the place where it entered, so leak location should be treated as a diagnostic clue, not final proof.
This guide focuses on one practical question: when an outdoor enclosure leaks, what does a hinge-side leak mean compared with a latch-side leak, and which part of the door should you inspect first? It is a triage guide, not a full repair manual. Once the leak side points you to a suspect, the deeper work is covered elsewhere: to confirm whether the cause is a loose latch or a worn gasket, use the loose latch vs worn gasket leak test; to understand how a seal degrades over months of weather exposure, see the outdoor enclosure seal loss maintenance guide. This page only helps you decide where to look first.
Quick Answer
A latch-side leak usually points to a compression problem. The latch may not be pulling the door tightly enough against the gasket, the strike may be misaligned, or the gasket may no longer rebound properly.
A hinge-side leak usually points to a geometry problem. The door may be sagging, twisting, moving away from the frame, or losing gasket contact near the pivot side. If water appears on both sides, at the bottom edge, or in more than one corner, inspect the full door system rather than one part.
The rule is simple: latch-side leak = check compression first; hinge-side leak = check alignment first; water location = starting clue, not final proof.
Leak Location Diagnosis Table
| Visible Leak Location | Most Likely First Suspect | What to Check First |
|---|---|---|
| Latch side | Weak compression | Latch engagement, strike position, gasket contact |
| Hinge side | Door geometry issue | Hinge sag, loose fasteners, hinge pin wear, frame twist |
| Bottom latch-side corner | Poor compression or water pooling | Latch pull, gasket corner joint, drainage path |
| Bottom hinge-side corner | Door drop or uneven gasket contact | Hinge alignment, door sag, bottom clearance |
| Top hinge-side area | Door twist or hinge-side gap | Door plane, hinge mounting, frame squareness |
| Water on both sides | System-level seal issue | Door flatness, gasket profile, latch spacing, frame |
| Leak changes with wind-driven rain | Pressure-related seal weakness | Door preload, gasket rebound, latch compression |
| Leak appears after repeated opening | Wear or alignment loss | Hinge play, latch wear, gasket compression set |
This table decides the first inspection step so the repair team does not replace the wrong part. It is not a final diagnosis by itself.
Why Leak Location Matters (But Is Not Proof)
Outdoor enclosure leaks often appear at the easiest exit point for water. Water can travel along a gasket line, run down an internal frame edge, collect at a lower corner, or move across the enclosure before dripping out. So a wet spot on the latch side does not prove the latch is the only problem, and a wet spot on the hinge side does not prove the hinge is the only problem.
Still, leak location matters because it shows where the seal system is losing control. The door, gasket, frame, hinge, latch, and enclosure body work as one system; when one part loses alignment or compression, water finds the weakest path. The visible pattern tells you whether to start with latch compression or hinge geometry — which is exactly what the two sections below are for.
What a Latch-Side Leak Usually Means
The latch side is where the door should be pulled tightly into the gasket, so a latch-side leak raises one first question: is the door generating enough compression at the gasket line? Likely contributors include loose latch hardware, cam or strike misalignment, insufficient latch preload, worn latch components, a door not pulling fully into the frame, or a gasket that has taken a compression set and no longer rebounds.
A latch-side leak is often easier to correct than a hinge-side leak because the repair may be local — adjusting the strike, restoring latch engagement, or correcting the cam position may restore sealing force. But do not simply tighten the latch harder, because too much force can crush the gasket, deform the door edge, or make future leaks worse. If you need to confirm whether the real issue is latch preload or gasket rebound, the hands-on test procedure is in the loose latch vs worn gasket leak test — this guide stops at “start on the latch side.” If the latch needs to provide controlled gasket compression rather than basic closure, the cam latch vs compression latch guide separates the two.
What a Hinge-Side Leak Usually Means
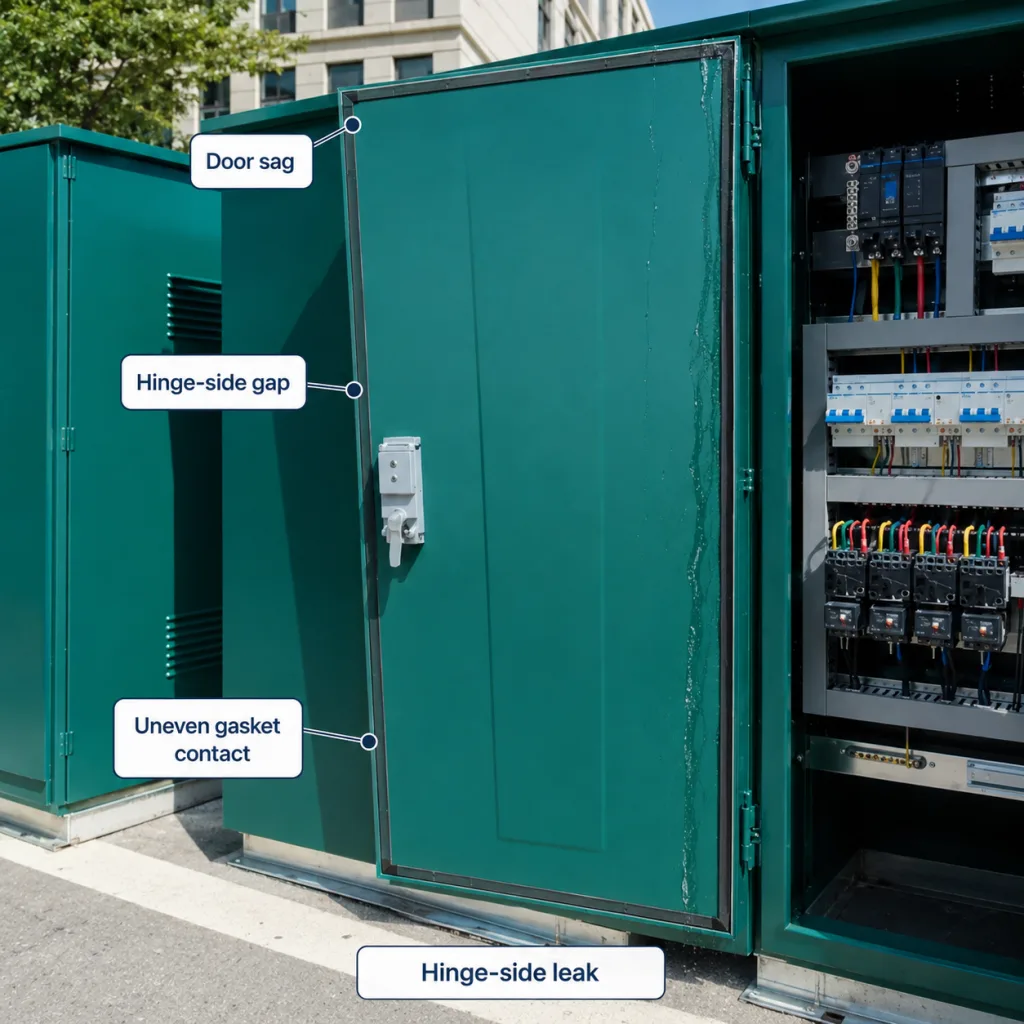
The hinge side is where the door geometry is controlled, so a hinge-side leak raises a different first question: is the door still sitting square and flat against the frame? Likely contributors include door sag, loose hinge fasteners, a worn hinge pin or knuckle, corroded hinge hardware, door twist, frame distortion, or uneven gasket engagement near the pivot side.
A hinge-side leak is usually more structural than a latch-side leak. The latch may still close, but the door may no longer contact the gasket evenly along the hinge edge — and in that situation, replacing the gasket alone will not solve the problem. If the water pattern suggests hinge-side sag or door drop, the selection root causes are covered in the guide to hinge selection errors that cause seal failure before you treat the leak as a gasket-only issue.
Why the Leak Side Is Not Always the Failure Side
A common mistake is assuming the wet side is always the failed side. In real outdoor service, water moves before it becomes visible: wind-driven rain may enter at a weak latch-side compression point and run along the frame; water may enter at an upper corner and appear near the bottom hinge; condensation may collect at a low point and look like a gasket leak.
So the correct diagnostic question is not only “where is the water visible?” but “where did the door system first lose compression, alignment, or water control?” Trace the leak path methodically — look for water marks, dust trails, gasket contact patterns, corrosion spots, and drip direction. A clean paper towel, an inspection light, and photos taken before cleanup help capture the true path.
First Inspection Steps, by Leak Side
These are triage checks to confirm which system to focus on. They are deliberately short — the detailed component tests (such as how to press and read gasket rebound) live in the leak-test guide linked above.
If the leak is on the latch side
- Confirm the cam or latch tongue fully engages the strike or frame
- Check the strike position for shift from vibration
- Watch whether the latch pulls the door evenly into the gasket on closing
- Look at the gasket contact mark near the latch side for an even pattern
- Check for latch looseness — screws, cam play, latch-body movement
If the latch checks out but the leak returns, the gasket condition or door geometry is the deeper issue — move to the hinge side or the leak-test guide.
If the leak is on the hinge side
- Compare the gap at the top and bottom — a diagonal reveal often means door drop
- Look for loose hinge fasteners, enlarged holes, or hinge-leaf shift
- Check for play in the hinge knuckle, especially on heavy or high-cycle doors
- Sight along the door face for twist that gaps the gasket in one area
- Check whether the enclosure frame is distorted or pulled out of plane
If the hinge side has moved, do not rely on latch force to fix the seal — the door geometry must be corrected first.
When the Gasket Itself Is the Cause
If the door is square, the latch works, and the hinge side is aligned but the seal still leaks, the gasket may be the root cause — through compression set, UV and heat aging, contamination, or damaged corner joints. Do not compensate for a failed gasket by over-tightening the latch, which only crushes the seal further. Because gasket aging is a time-and-weather process rather than a leak-location question, the mechanism and maintenance are covered in the outdoor enclosure seal loss maintenance guide rather than repeated here.
Hinge and Latch Must Be Read Together
The two sides interact, which is why leak location is a starting clue and not a verdict. If the hinge side sags slightly, the latch side may no longer meet the strike correctly — the visible leak appears near the latch, but the root cause is door drop. Conversely, if the latch pulls one side too aggressively while the hinge side stays fixed, the gasket compresses unevenly and the door can develop a twisted sealing pattern over time. Diagnose the leak as a door system — door weight, hinge spacing, latch preload, strike position, gasket profile, frame squareness, and outdoor exposure all interact.
Common Mistakes to Avoid
Mistake 1: Replacing the Gasket Before Checking Alignment
A new gasket may hide the problem briefly, but it will not fix a sagging door or twisted frame.
Mistake 2: Over-Tightening the Latch
More force is not always better. Excessive latch pressure can crush the gasket, bend the door edge, or make the seal less consistent.
Mistake 3: Assuming the Wet Side Is the Failed Side
Water can travel before it appears. Always trace the leak path before replacing hardware.
Mistake 4: Ignoring Hinge Wear on Wide Doors
A small amount of hinge play can become a large gap at the latch side, especially on wide or heavy doors.
What to Send a Supplier
A note that says “cabinet leaks on the left side” is not enough. Photos of the compression pattern, hinge gap, and strike engagement are often more useful than the leak location alone. Record the enclosure orientation, door size and weight, hinge and latch type and location, gasket material and profile, the visible leak location and suspected entry point, the weather during the leak, and any recent maintenance.
With that, HTAN can help review whether the likely cause is latch compression, hinge alignment, gasket condition, or a full door-system issue, and recommend suitable compression latches or hinges for the enclosure. For the target sealing level, the enclosure’s required IEC 60529 IP rating defines how much dust and water protection the closed door must maintain.
FAQ
Does a latch-side leak always mean the latch is bad?
No. A latch-side leak usually points to a compression problem, but the cause may be the latch, strike, gasket, door geometry, or frame alignment. Start with latch engagement and gasket contact, then confirm the leak path before replacing parts.
Does a hinge-side leak always mean the hinge is bad?
No. A hinge-side leak often suggests sag, twist, or poor geometry near the pivot side, but water may have traveled from another weak point. Inspect hinge alignment, door flatness, frame squareness, and gasket contact before replacing the hinge.
Should I replace the gasket first?
Not before checking door alignment. If the door is sagging or out of plane, a new gasket may not seal evenly. Check hinge geometry, latch compression, and gasket condition together, and treat gasket aging as a separate maintenance question.
Can tightening the latch stop an outdoor enclosure leak?
Sometimes, but only if the problem is insufficient compression and the gasket is still healthy. Over-tightening can crush the gasket or distort the door edge, so it should not be used as a universal fix.
Why does the leak move from one side to another?
Water can travel along the gasket, frame, or internal surfaces before becoming visible. Wind-driven rain and gravity can make the visible drip location different from the actual entry point, which is why the leak side is a clue rather than proof.
What should I send a supplier when asking for help?
Send photos of the leak location, gasket compression marks, hinge side, latch engagement, and door gap, plus the enclosure orientation. Also include door size, hinge type, latch type, gasket profile, required IP rating, and outdoor exposure conditions.
Final Recommendation
A hinge-side leak and a latch-side leak are not just two locations on the door — they usually point to different first inspection paths. A latch-side leak should make you check compression: latch engagement, strike position, door pull-in, and gasket rebound. A hinge-side leak should make you check geometry: hinge sag, loose fasteners, door twist, frame distortion, and gasket contact near the pivot side. If both sides leak, or if the leak changes with wind or repeated use, inspect the full door system instead of replacing one part.
The right question is not “where is the water visible?” but “where did the enclosure first lose control of compression or alignment?” Use the leak side to choose where to look first, then move to the leak-test and seal-loss guides to confirm the component. If you are diagnosing an outdoor enclosure leak, send photos of the leak pattern, hinge side, latch side, gasket contact, and door gap, and HTAN can help review whether the likely cause is latch compression, hinge alignment, gasket condition, or a full door-system issue, or start with the [complete seal failure diagnostic guide] to work through all five root causes step by step.