HTAN is one of the leading manufacturers of industrial hinges, handles and latches in China.


Outdoor enclosure leaks are often misdiagnosed. When water appears inside an electrical cabinet, communication enclosure, battery cabinet, control box, EV charger housing, or solar combiner box, the gasket is usually blamed first. That is not always correct. A gasket can look old and still seal if the latch pulls the door tightly and evenly against the frame. A gasket can also be new and still leak if the latch no longer provides enough closing force.
This guide gives maintenance engineers, project leads, and enclosure buyers a hands-on way to physically test whether a leak comes from a loose latch or a worn gasket — before ordering replacement parts. It does not explain why seals degrade over time; that mechanism, along with maintenance intervals and environment severity, is covered in the guide on how outdoor enclosure seals degrade over time. This article focuses only on the field tests that separate a loose latch from a worn gasket.
Quick Answer

If the door gap becomes smaller when you manually push the door toward the frame, the latch or hinge side is probably not providing enough compression. If the gasket stays flattened after being pressed and does not spring back, the gasket itself is probably worn. If both happen, test in order: latch compression first, then gasket rebound, then trace the leak path. The one rule that drives everything below: a loose latch cannot compress even a good gasket, and a worn gasket cannot recover even when the latch is correct.
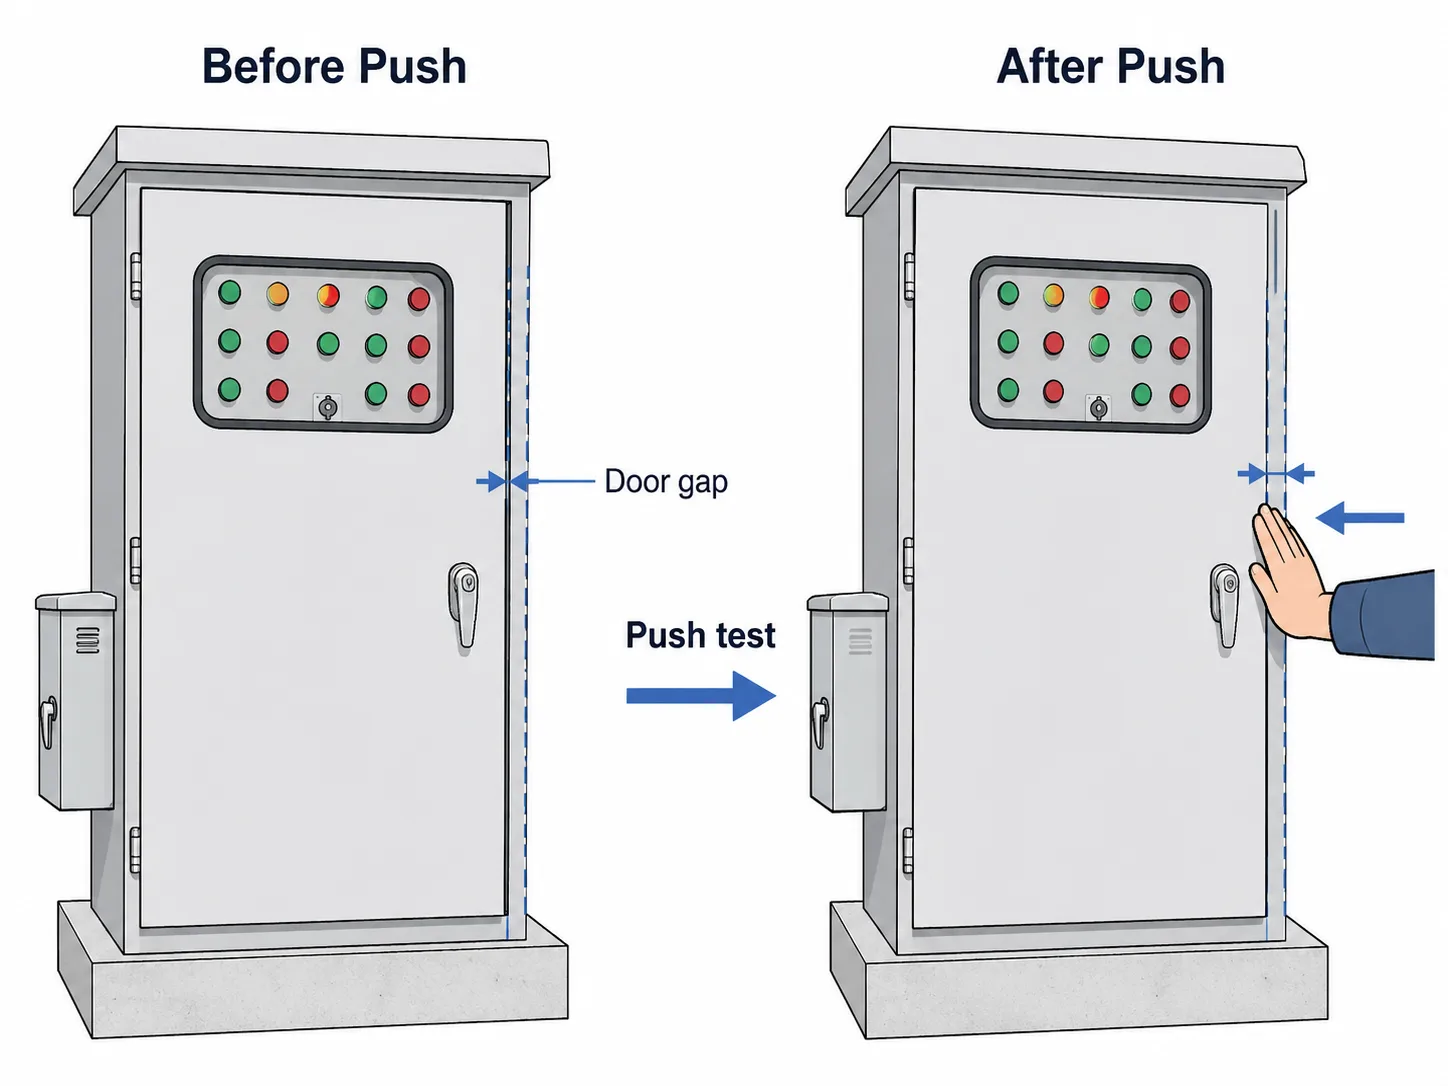
Test 1: Door Gap and Latch Travel (Tests the Latch)
Always test the latch side before removing the gasket. This test takes under a minute and tells you whether the latch can still pull the door into the seal.
Close the enclosure door normally. Look at the gap between the door and frame near the latch side and corners. Then push the door gently but firmly toward the frame and watch the gap.
| Test Action | What You Observe | Judgment |
|---|---|---|
| Push the closed door toward the frame by hand | The gap visibly decreases | Latch is NOT pulling the door fully in — suspect the latch or hinge, not the gasket |
| Push the closed door toward the frame by hand | The gap does not change | Latch compression is adequate — move to the gasket test |
| Operate the latch handle | Handle feels loose, over-rotates, or never reaches a firm stop | Latch has lost effective travel — inspect cam, strike, fasteners |
| Operate the latch handle | Handle reaches a firm, repeatable closed position | Latch travel is fine — the problem is likely elsewhere |
If manual pressure improves the seal, do not order a new gasket. The test has shown the latch cannot pull the door into the seal on its own. Inspect the latch cam, fasteners, strike or keeper position, hinge alignment, and latch grip range. (For why a latch loses closing force over time — preload loss, wear, corrosion — see the seal degradation guide; this article stays on how to test, not why it happens.)
Test 2: Gasket Rebound (Tests the Gasket)
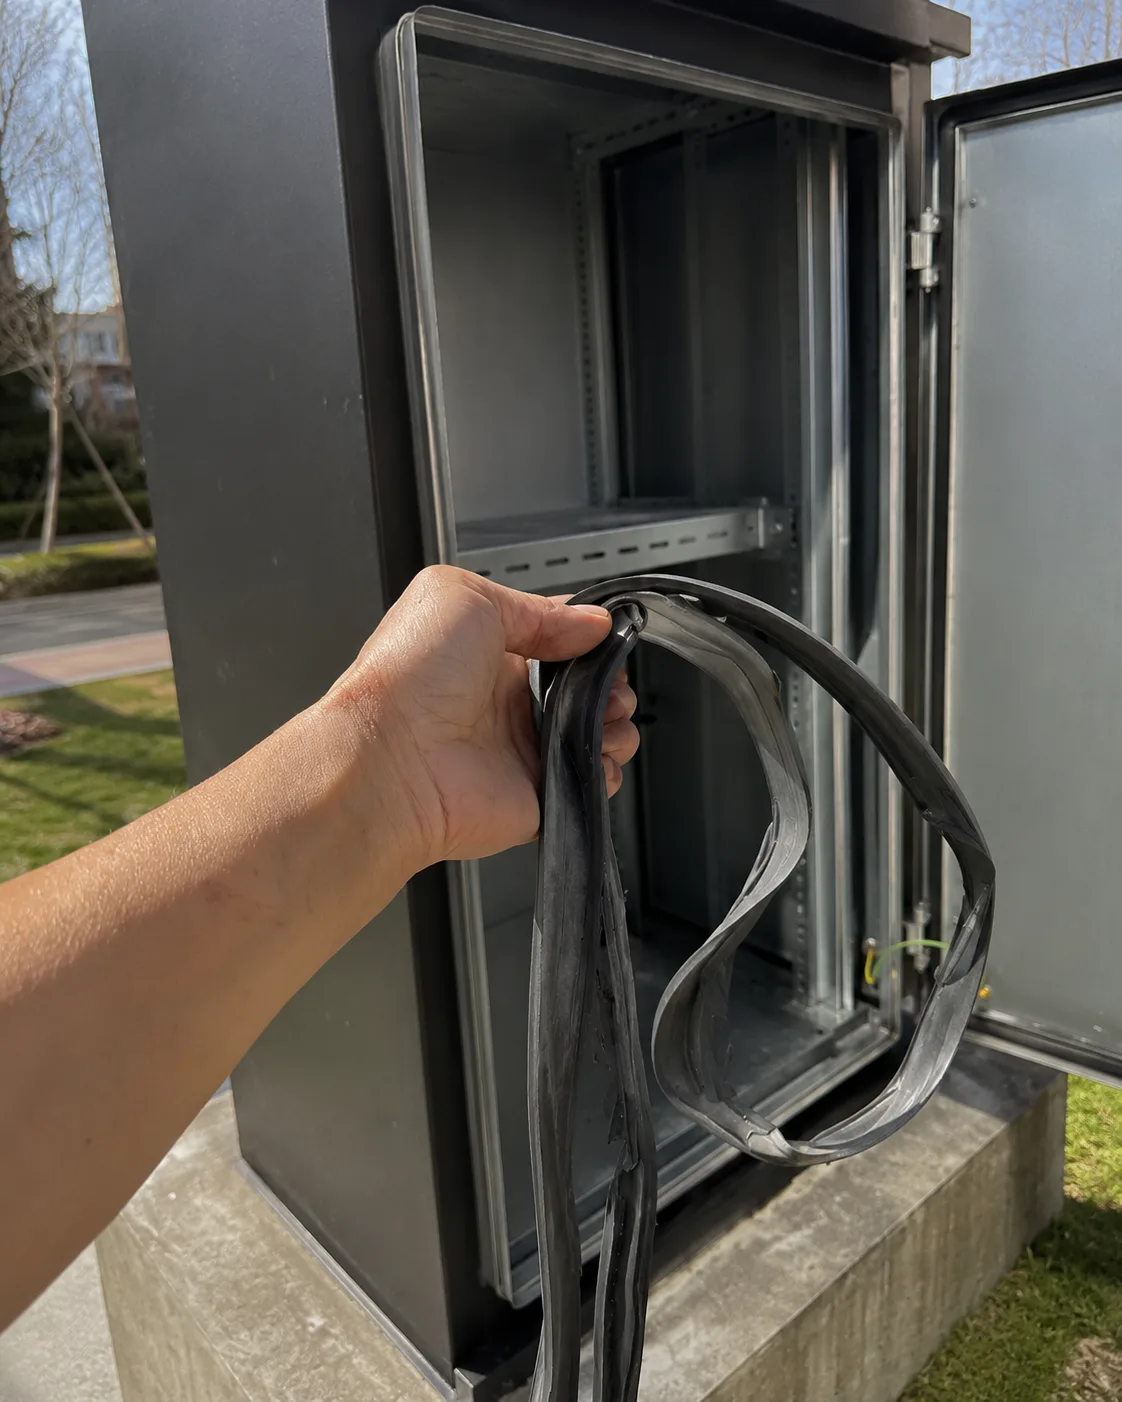
Only after the latch test, inspect the gasket. Open the door and check the full gasket path — latch side, hinge side, top corners, and bottom edge. Press the gasket gently with a blunt tool or your thumb, then release it and watch how it recovers.
| Test Action | What You Observe | Judgment |
|---|---|---|
| Press the gasket and release | It springs back to shape quickly | Gasket rebound is healthy — the gasket is probably not the cause |
| Press the gasket and release | It stays flattened or recovers slowly | Gasket has lost rebound — replacement is likely needed |
| Run a finger along the gasket surface | Surface is cracked, hard, sticky, or shrinking at joints | Gasket material has aged — replace and confirm material compatibility |
| Check gasket height around the perimeter | Height is uneven or compressed flat in spots | Local compression set — replace; recheck latch pressure after |
If the gasket does not rebound, it can no longer seal reliably even when the latch works. Replace or re-bond it — but after fitting a new gasket, repeat Test 1. A new gasket with the wrong thickness or profile can make the door hard to close or prevent even compression, which produces a new leak that looks like a latch fault.
Test 3: Leak Path Tracing (Locates the Weak Point)
After checking latch travel and gasket rebound, find where water actually enters. The goal is not to flood the cabinet — it is to locate the weak point around the seal path under realistic conditions. Use a controlled method: water-based chalk along the gasket contact path, a light spray followed by visual inspection, moisture marks inside the frame, a dry-equipment dust-trail inspection, or a tissue strip held around suspected gaps.
Where the leak enters tells you which test result to trust. The table below maps the entry location to the test that should confirm it — not to a root-cause theory, but to the next physical check.
| Where the Leak Enters | Which Test to Trust | Next Physical Check |
|---|---|---|
| Mainly at the latch side | Test 1 (door gap / latch travel) | Re-check latch compression, strike position, latch wear |
| At the hinge side | Test 1, but on the hinge | Check door drop, lift-to-close, top-vs-bottom gap |
| Along several sides or full perimeter | Test 2 (gasket rebound) | Confirm gasket profile, height, and uniform contact |
| Mainly at the corners | Test 1 + 2 together | Check door/frame squareness and gasket joints |
| At the bottom edge only | Visual / drainage | Check standing water, debris, and drainage path |
| Only under wind-driven rain | Test 1 (marginal compression) | Re-check latch side and corner compression |
Avoid high-pressure testing that can deform the door or force water through areas that would not normally leak. The test should reproduce realistic service conditions, not create false failures.
The Three-Step Field Sequence
Run the three tests in this order during a site inspection. The sequence matters: testing the latch first prevents the most common and most expensive mistake, which is replacing a visible gasket while the latch is the real problem.
- Test latch compression first. Close the door, check the latch-side gap, and push toward the frame. If the gap changes, the latch or hinge is the lead suspect.
- Test gasket rebound second. Press the gasket and watch recovery. If it stays flat, cracked, or hard, the gasket is the lead suspect.
- Trace the leak path third. Confirm whether water enters at the latch side, hinge side, corners, bottom edge, or full perimeter, and match it to the test results above.
If the tests point to the latch and you are considering a different latch type rather than a simple adjustment, the comparison of cam latch vs compression latch helps decide whether basic closure is enough or whether controlled gasket compression is required. If the leak traces to the hinge side, the mechanism behind hinge-driven seal failure is covered in the guide to hinge selection errors that cause seal failure.
Reading the Results: Loose Latch or Worn Gasket
Once the three tests are done, the combined result usually points clearly to one part. This table reads the combination of test outcomes rather than any single symptom.
| Test 1 (door gap) | Test 2 (gasket rebound) | Conclusion |
|---|---|---|
| Gap closes when pushed | Gasket rebounds fine | Loose latch / alignment — adjust or replace the latch, not the gasket |
| Gap stays constant | Gasket stays flat or cracked | Worn gasket — replace gasket, then re-run Test 1 |
| Gap closes when pushed | Gasket stays flat | Both worn — fix latch compression first, then replace gasket |
| Gap stays constant | Gasket rebounds fine | Neither — trace the leak path; suspect corners, drainage, or wind-driven entry |
The fourth row is the one teams miss most often: when both the latch and gasket test fine, the leak is usually a path or alignment issue, not a worn part. Replacing parts in that case wastes money and does not stop the leak.
Checking the Hinge Side (Often Mistaken for a Latch or Gasket Fault)
Some leaks pass both the latch and gasket tests but still let water in. The reason is often the hinge side. If the hinge side has dropped or shifted, the latch side can still close while gasket contact becomes uneven across the door — which looks like a latch or gasket fault but is actually door alignment.
Test the hinge side, rather than theorise about it, with these checks: does the door have to be lifted to close, is the gap wider at the top than the bottom, does the door rub the frame, and is gasket compression uneven from top to bottom? If yes to any, the hinge side needs correction before further latch or gasket work. The underlying mechanism of how hinge sag causes seal failure is explained in the hinge seal-failure guide; here the point is simply how to test for it in the field.
What to Send a Supplier Before Ordering Parts
Do not request a replacement by saying only “the cabinet leaks” or “send a new gasket.” Send enough field-test evidence for the supplier to confirm whether the latch, gasket, hinge, or alignment is the issue. The lists below are organised by which part your tests pointed to.
If Test 1 Pointed to the Latch
- Photos of the latch closed and open, and of the strike or keeper
- Door thickness and frame thickness
- Latch type and handle travel or closing feel
- Any visible wear on cam or strike
- Whether the door gap changes when pushed (your Test 1 result)
- Operating environment, opening frequency, corrosion or vibration exposure
If Test 2 Pointed to the Gasket
- Full gasket-path photos plus close-ups of cracked or flattened areas
- Gasket profile shape, height, and width
- Groove or mounting dimensions, and whether adhesive or mechanical retention is used
- Material if known, and temperature, UV, chemical, or washdown exposure
- Whether the leak follows one side or the full perimeter (your Test 3 result)
If the Leak Traced to Alignment
- Full door photo plus hinge-side, latch-side, top, and bottom gap close-ups
- Whether the door must be lifted or pushed to close
- Any frame damage or distortion
A clear, test-backed request lets the supplier recommend whether to adjust the latch, change the latch grip range, replace the gasket, or inspect alignment first — instead of guessing. If the outcome is a latch change for a vibrating or frequently opened cover, the draw latch vs cam latch comparison can guide the replacement choice.
Common Field Mistakes
Mistake 1: Replacing the Gasket Before Testing the Latch
A new gasket will still leak if the latch cannot pull the door into the seal. Run Test 1 first — it takes under a minute and is free.
Mistake 2: Overtightening the Latch to Mask a Dead Gasket
More force is not better. If Test 2 shows the gasket no longer rebounds, extra latch force only stresses the cam, door, and frame without restoring the seal.
Mistake 3: Not Rechecking After Repair
After replacing a latch or gasket, re-run all three tests. A new gasket can change the closing force; a new latch can change the compression. Confirm the door gap, gasket contact, and leak path again.
Mistake 4: Skipping the Leak-Path Trace
When both parts test fine, the leak is a path or alignment issue. Skipping Test 3 leads to replacing good parts while the real entry point stays open.
FAQ
Can a new gasket still leak if the latch is loose?
Yes. If the latch does not provide enough closing force, even a new gasket cannot be compressed enough to seal. This is why you should run the door-gap push test on the latch before ordering a gasket — if the gap closes when you push the door by hand, the latch or hinge alignment is the likely cause.
How do I test whether the gasket is worn?
Press the gasket gently with a blunt tool or your thumb, then release it. A healthy gasket springs back to shape quickly. A worn gasket stays flattened, recovers slowly, or shows cracking, hardening, or a sticky surface. If it does not rebound, replacement is usually needed.
Should I test the latch or the gasket first?
Test the latch first with the door-gap push test, because it is faster, free, and prevents the most common mistake of replacing a gasket while the latch is the real problem. Only after the latch test passes should you inspect gasket rebound, then trace the leak path.
What if both the latch and the gasket test fine but it still leaks?
Then the leak is usually a path or alignment issue, not a worn part. Trace the leak path with chalk or a light spray, and check the hinge side for sag — a dropped hinge side makes gasket contact uneven even when the latch and gasket are good. Replacing parts in this case will not stop the leak.
Why does my outdoor enclosure leak only during heavy rain?
Intermittent leaks usually come from marginal compression, corner gaps, or wind-driven rain finding a weak point that stays sealed under lighter exposure. Re-run the latch-side door-gap test and check the corners — a fully dead gasket would normally leak even under light conditions, so an only-in-heavy-rain leak points more toward compression or alignment.
What information should I send before ordering replacement parts?
Send the results of your three field tests plus photos of the latch, gasket, hinge side, door gap, and leak location. Include door thickness, gasket profile, operating environment, opening frequency, and crucially whether the door gap changes when pushed by hand. Test-backed evidence lets the supplier confirm the fix instead of guessing.
Final Recommendation
Do not order a gasket just because water appears inside the cabinet. Run the three field tests in order — door gap, gasket rebound, leak path — and read the combination, not a single symptom. If the door gap closes when pushed by hand, the cause is latch compression, hinge sag, or alignment, not gasket material alone. If the gasket fails the rebound test and the door already meets its compression target, replace the gasket with the correct material and profile, then re-test the latch.
For new enclosure designs, specify latch closing force and gasket compression range together per the required sealing level, including any IEC 60529 IP rating — a latch and gasket are not independent parts; they work as one sealing system. If you want help reading a leak, send your three test results plus photos of the latch, gasket, hinge side, and door gap, and HTAN can help identify whether the next step is latch adjustment, gasket replacement, hinge correction, or a full sealing review.For the full diagnostic sequence…see the [seal failure diagnostic guide].